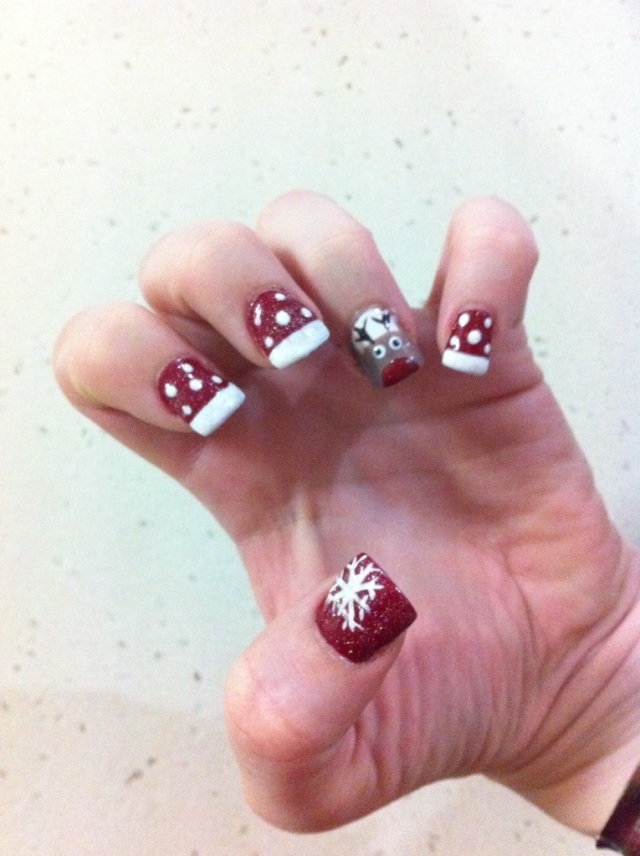


This was a Christmas design I did on the nails of a good friend of mine. I had an inkling it wouldn’t be long til her partner proposed so tried to do an extra meticulous job in case this was the nail design she wore when she got engaged. The next night she had the ring. Woohoo!!!!
So, the nails. The colours used were:
Red – Cosmopolitan – Gelicious
White – Artic Freeze – Gelish
Glitter – Vegas Nights – Gelish
Dark brown – Expresso – Gelish
Light brown – a mix of Expresso by Gelish and Thankful by Gelicious
Black – Black Shadow – Gelish
Rudolph’s Nose Red – The Spy Who Loved Me – OPI
To do this design I chose two feature nails per hand. Four nails each hand, including one feature, were painted red. The other nail was painted white. Each nail was painted with three coats of the base colour. For the non-feature nails I then painted white tips and, using a dotting tool, white spots. I painted two coats on the tips as the red leaked into the colour a little.
The snowflake on the red feature nail was surprisingly easy to do. I used a nail art pen with a long, thin brush to accomplish it. First I painted a cross on the nail. Then I painted another cross, this time with slightly shorter lines going diagonally through the original one so I had an eight pronged star. For each line, near the top I did two small lines on either side. Once this was done, the snowflake was completed.
Painting Rudolph was a little more complex so I used a guide I had seen on Pinterest (picture is attached – tutorial found here: How to: Reindeer Nail Art ) I used a short, thicker nail art brush to do Rudolph’s head in the light brown, a thin nail art brush to do the antlers and the dotting tools for his eye. The red nose was done using the normal nail polish brush.
The mani was then coated with a layer of glitter polish and sealed with a top coat. Enjoy! If you try it out, let me know what you think 🙂


